Overview
This guide walks you through:
- Installing Node.js on your system
- Installing Claude Desktop application
- Configuring the Incorta MCP Server in Claude Desktop
- Setting up your Incorta credentials and connection details
Prerequisites
- A computer running macOS or Windows
- Internet connection for downloading Node.js and Claude Desktop
- Incorta environment URL and tenant name
- Incorta Cloud Portal Access Token (PAT)
- Advanced SQL Interface connection string (SQLx)
- Your Incorta username
Step 1 — Install Node.js
Download Node.js
Visit https://nodejs.org/en/download and download the appropriate installer for your operating system.
Verify Installation
Open any terminal (Command Prompt on Windows or Terminal app on macOS) and type:
npx --versionThis command should return the version number, confirming Node.js is installed correctly.
Step 2 — Install Claude Desktop
Download and install Claude Desktop on your system from https://claude.ai/download.
Step 3 — Open Developer Settings
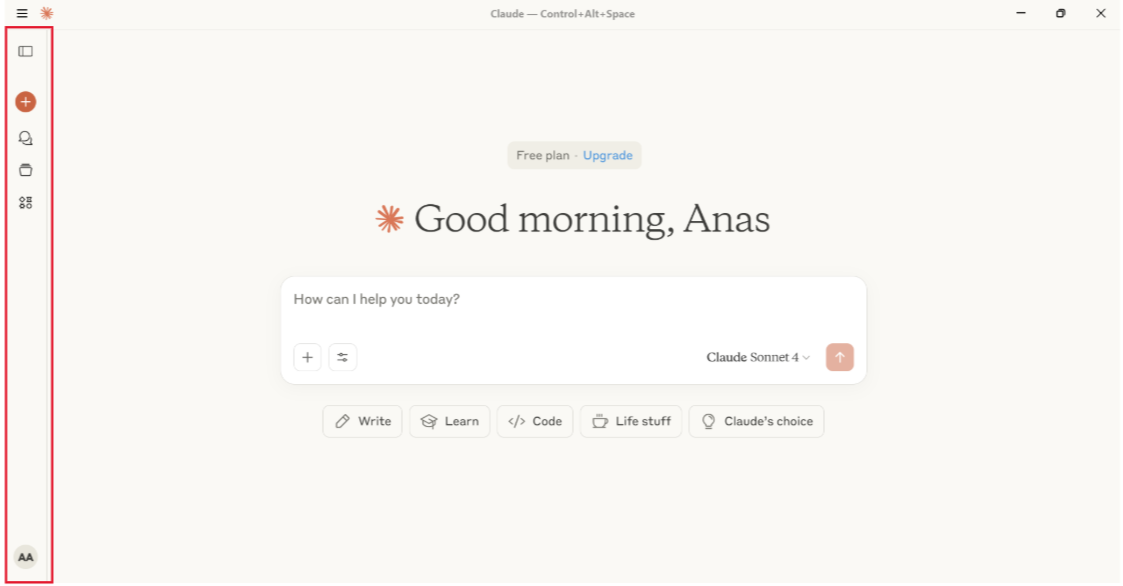
Open the Side Menu
Launch Claude Desktop and open the side menu.
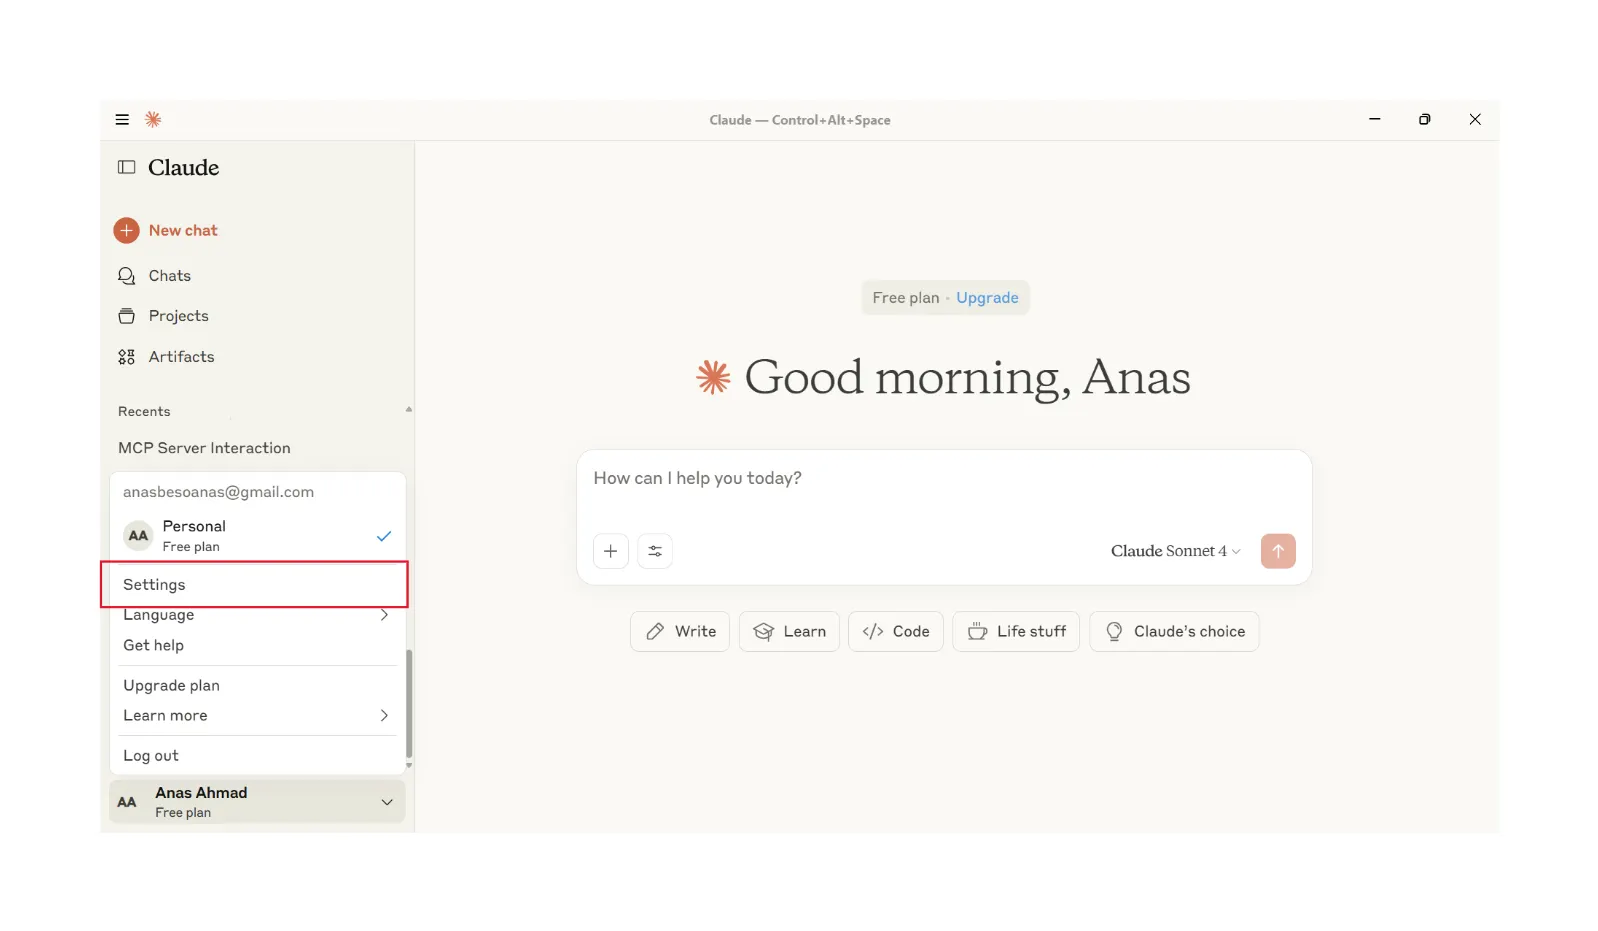
Navigate to Settings
Go to the bottom-left corner, click your Name, then select Settings.
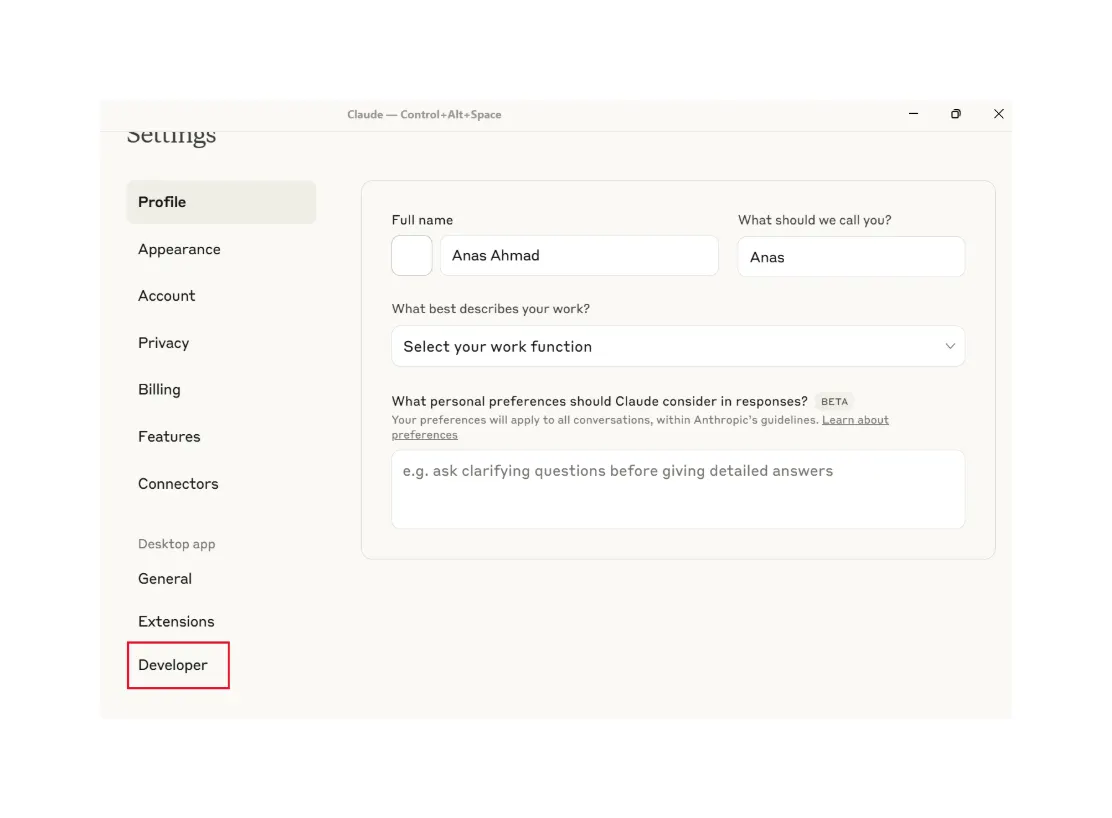
Open Developer Settings
In Settings, navigate to Developer Settings.
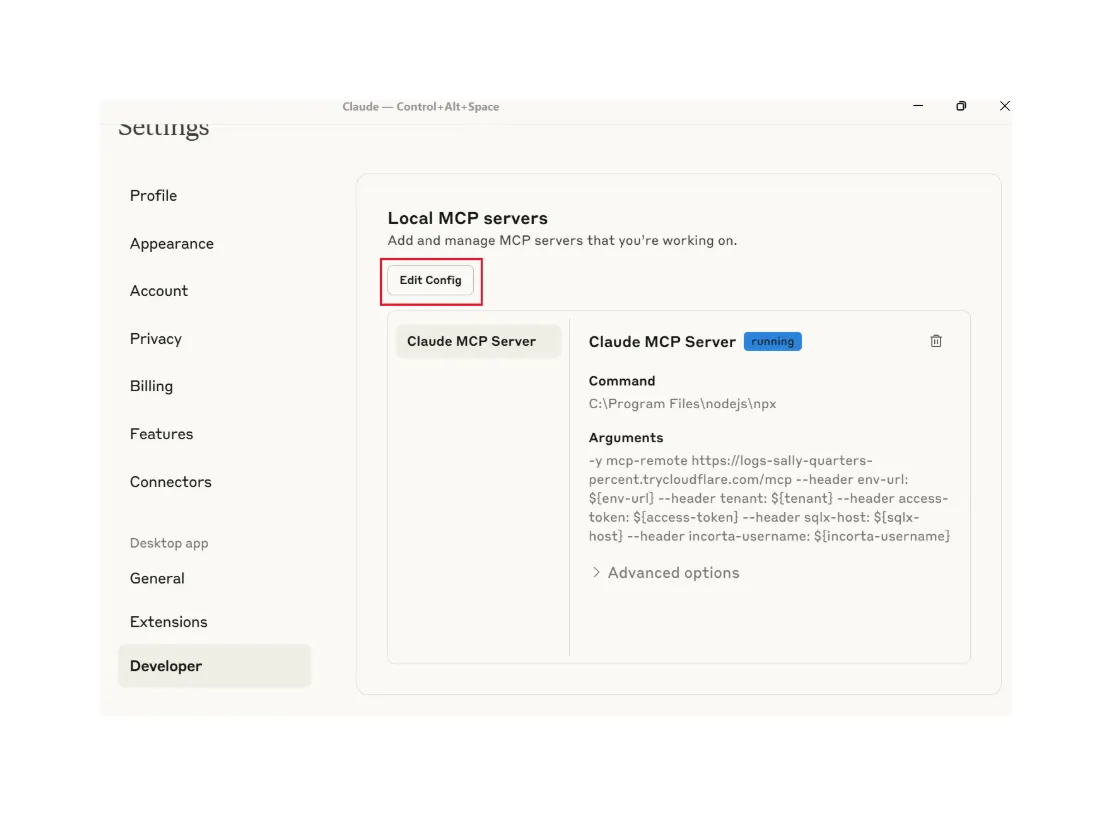
Locate the Configuration File
Your file browser will appear. Find the file named claude_desktop_config.json and open it in any text editor.
Clear Existing Content
Delete any existing content in the file before proceeding to the next step.
Step 4 — Insert MCP Server Configuration
Replace the content of claude_desktop_config.json with the following configuration:
{
  "mcpServers": {
    "Incorta MCP Server": {
      "command": "npx",
      "args": [
        "-y",
        "mcp-remote",
        "https://incorta-mcp.incortaops.com/mcp/",
        "--header",
        "env-url: ${env-url}",
        "--header",
        "tenant: ${tenant}",
        "--header",
        "access-token: ${access-token}",
        "--header",
        "sqlx-host: ${sqlx-host}",
        "--header",
        "incorta-username: ${incorta-username}"
      ],
      "env": {
        "env-url": "YOUR_INCORTA_ENVIROMENT_BASEURL/api/v2",
        "tenant": "YOUR_TENANT",
        "access-token": "YOUR_INCORTA_CLOUDPORTAL_ACCESS_TOKEN_(PAT)",
        "sqlx-host": "Advanced_SQL_Interface_connection_string(SQLX)",
        "incorta-username": "INCORTA_USERNAME"
      }
    }
  }
}
Step 5 — Edit Environment Variables
Inside the "env" section of the config, update the following values with your own details:
env-url
Replace with your Personal Incorta environment base URL, then add /api/v2 to the end.
https://testcluster.cloudstaging.incortalabs.com/incortabecomes
https://testcluster.cloudstaging.incortalabs.com/incorta/api/v2
tenant
Replace with your Incorta tenant name.
access-token
Replace with your Incorta Cloud Portal Access Token (PAT).
sqlx-host
Replace with your Advanced SQL Interface connection string.
incorta-username
Replace with your Incorta username.
Step 6 — Save and Restart
Save the Configuration
Save the updated claude_desktop_config.json file.
Force Quit Claude (Mac)
- Open the Apple menu → Force Quit
- Select Claude
- Click Force Quit
- Reopen Claude
End Task (Windows)
- Open Task Manager
- Locate Claude
- Click End Task
- Reopen Claude
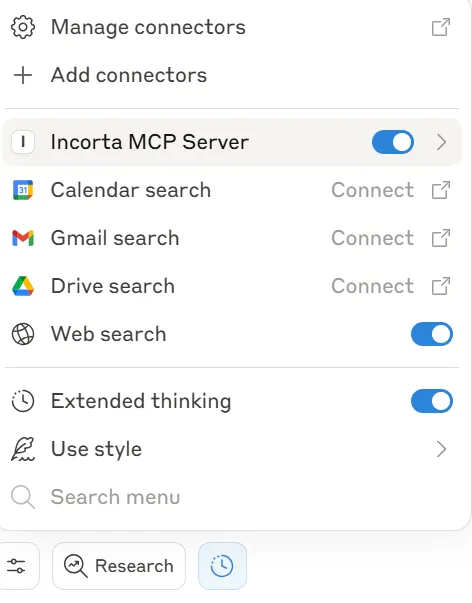
Verify Connection
Ensure that the server is connected successfully.
Example Prompts
Once connected, try these example prompts:
- "Can you tell me more details on the data available in
OnlineStoreschema?" - "In
OnlineStoreschema, what are the most selling categories and their purchases and profit from this?"
Errors and Issues
Verify Node.js Installation
Ensure that you have downloaded and installed Node.js correctly.
Locate npx Path
Run the following command in your terminal:
- Mac:
which npx - Windows:
where npx
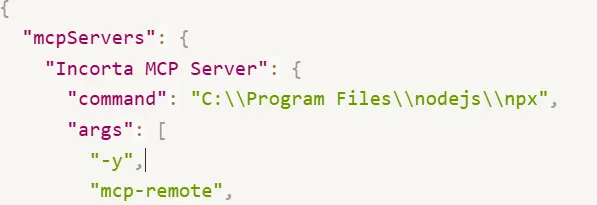
Update Configuration with Full Path
Take the path returned by the command above and replace "npx" with the full path in the "command" field of claude_desktop_config.json.
Revision History
Updated setup guide to focus on Claude Desktop integration with Node.js and MCP server configuration. Replaced OAuth 2.0 CMC setup with direct client configuration approach.